Image Editor Reference - Tools
The Tool Palette
The image editor has a large number of painting tools, and it's possible to add new ones as plugins. The tools appear in the Tools Palette, shown here:

The Tool Palette
Selection Tools
There are four selection tools: the rectangle, ellipse, lassoo and magic wand selection tools. To select a rectangle, choose the rectangle selection tool, and then simply click and drag out the desired rectangle. To constrain the rectangle to a square, hold down the Meta key while dragging.
The Lassoo tool allows you to draw a freehand selection.
The Magic Wand tool selects pixels of a similar color to wher you click. It works in basically the same way as the Paint Bucket tool.
Normally, any selection you make replaces the current selection. If you want to add to the existing selection, hold down the Shift key. To subtract from the existing selection, hold down the Alt key.
You can use the arrow keys on the keyboard to nudge the selection one pixel at a time.
It is also possible to select using the drawing tools. See below.
All drawing and painting tools will only paint into the current selection. If nothing appears to happen when you try painting, you probably ave a small selection somewhere and you're painting outside it. If this happens, try selecting the whole image.
The Move Tool
Once you have a selection, you can use the Move tool to move or copy pixels from one place to another. When you select the Move tool, you'll see grab handles around the selection, like this:
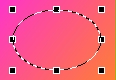
Grab Handles
Click and drag inside the selection to move the whole selection or inside a handle to resize it. Click outside the selection to rotate it. When you use the Move tool, the pixels in selection are moved - that is, pixels "underneath" are cleared. Hold down the Alt key to make a copy instead.
Once you have moved the selection, it goes into a "floating mode", and you can move it again until you have it positioned correctly. The change will be committed to the image when you select another tool or perform any other operation on the image, such as filtering.
The Eyedropper Tool
The Gradient tool draws various types of gradient in the image. It has these controls:
The Paint Bucket Tool
The paint bucket tool fills an area around the point where you click, filling all pixels of a similar color to the clicked pixel. It has a control which lets you choose the tolerance of color matching. If you set this to zero, only exact pixel matches count. If you set it to 100%, it'll fill the whole image.
Drawing Tools
There are a number of tools which draw shapes into the image. These all have some controls in common: tools which draw lines have a line width control, while tools which draw closed shapes have, in addition, a control which lets you choose the painting mode. The mode can be:
- Draw - draws the outline of the shape with the foreground color
- Fill - fills the shape with the foreground color
- Both - fill with the background color and draws the outline with the foreground color
- Select - makes a selection with the shape
- Add Select - adds the shape to the selection
- Subtract Select - subtracts the shape from the selection
The line drawing tools are the Line tool and the Arrow tool. These are basically the same except that the arrow tool draws arrowheads at the ends of the line. You have a choice of arrowhead shape for each end.
The shape drawing tools are the Rectangle, Round Rectangle, Ellipse, Star and Shape tools. The Star tool draws regular polygons or stars, while the Shape tool draws custom shapes. These shapes are stored in a "Shapes" folder located in the library folder for the editor. You can add new shapes to this library by creating a new file holding the shape. The file format is simply an XMLEncoded AWT Shape.
To constrain to a square, hold the Meta key while dragging.
Painting Tools
There are a number of painting tools which let you paint with a brush. The most important of these is the Brush tool. The Eraser, Pencil and Clone tools are shortcuts which override certain settings of the current brush.
The Brush tool has these controls:
![]()
Brush Controls
These give you access to common settings, while the Advanced button shows a dialog with a lot of scary settings.
The Brush tool is quite complex and is explained further in Image Editor - Painting.
The other tools override the settings of the Brush tool: The Clone tool overrides the paint mode, the Eraser tool overrides the blending mode and the Pencil tool forces brush dabs to lie exactly on pixels so you can paint individual pixels.
The Text Tool
The Text tool allows you to add text to the image. When you click on the image, a caret will appear where you clicked and you can then type text. This is a normal text editor and you can select, erase and so on. The text tool has controls which let you choose the text font and you can change the color of the text by chaging the paint color in the nromal way. The text is added to the image as a new layer when you choose another tool or make a change to the image.
The Gradient Tool
The Gradient tool draws various types of gradient in the image. It has these controls:
![]()
Gradient Tool Controls
The "Use Colormap" check box draws a gradient using the currently selected gradient. If this is not selected, then the gradient will go from the background to the foreground color. The second control is the type of graidnt. Choose from Linear, Bilinear, Radial, Square, Fan and Clock. The third control gives the type of interpolation for the gradient, and finally, the "Repeat" control allows you to specify that the gradient repeats outside its start and end points rather than clamping.
Warping Tools
There are two warping tools: The Perspective Warp and Mesh Warp tools. These have some features in common, but of the two the Perspective tool is the easiest.
The Perspective tool is similar to the Move tool: When you select it, four grab handle appear at the corners of the selection. You can drag these around to distort the image. The changes you make are committed when you choose another tool or make any other change to the image.
The Warp tool is much more complicated, but powerful. It warps an image according to two imaginary grids draw over it. The first grid, shown in red, is the source grid, and the second, shown in green is the destination grid. Pixels in the image are moved according to their position in both grids. You may be able to achieve what you need by only manipulating the destination grid. Using the source grid allows finer control. By default, only the destination grid is shown, but you can display either grid using the controls. You move the grids by clicking and dragging on the handles at the grid intersections. You can select a whole group of points by dragging a rectangle around them, and then move the whole bunch by clicking and dragging one of the selected points. To add or remove grid rows and columns, right-click (control-click on the Mac) on the grid and a menu will appear allowing you to perfomr various operations on the grid.
View Tools
There are two tools which change the view: the Pan and Zoom tools. Neither of these tools change the image - they just affect the view. Use the Pan tool to drag the image within the view. This has no effect unless scrollbars are visible. Use the Zoom tool to zoom in. Holding down the Control key allows you to zoom out.